DIY origami box: simple workshops for beginners
Origami boxes are increasingly chosen for small presentations. For example, for a wedding or children's birthday, such bonbonnieres are simply an irreplaceable option. Making them is very simple, so we suggest right now trying to implement one of the presented master classes.


Origami box for beginners
For those who are not familiar with the origami technique, we recommend starting with a simple box. For work, you need only a sheet of paper, since scissors or glue should not be used in the process.

To get started, put the paper color side down and fold it in half. The result is a rectangle that we fold again to make a square. We unfold it and bend each corner to the center, as in the second picture. Fold each corner to the center again and expand so that we get a hexagon.
Lift the two sides so that they are perpendicular to the paper. They will be the walls of the box. Carefully hold them in the same position and raise the other two sides, bending the ends inward. We straighten the details and that's it, a simple origami box is ready!

Such boxes look great not only as small presentations, but also as original containers for storing various little things.


DIY box in the shape of a cat
Small gifts have already become an integral attribute of themed children's parties. Small packaging boxes are ideal as packaging for them. In this case, we propose to make them in the form of a cat. It looks very cute, so be sure that every child will appreciate this gift.

For such a box, we need two squares of different sizes.
Let's start with the bigger one and fold it in half. Unbend and fold in half in the opposite direction. We do the same, but diagonally. 
We bend each corner to the central point of the workpiece.

Turn over and fold horizontally in half.

Carefully take the workpiece and clamp the right and left corners with your fingers. If desired, they can be fixed with paper clips or other clips.
We connect all the corners as shown in the photo.

We bend the triangles: front to the right, and rear to the left.

It turns out a kind of pocket, as in the photo. Insert fingers into each half and gently straighten the paper, slightly pulling it to the bottom.

Turn the workpiece over and do the same on the other side. Fold the triangles together with each side.


The result is a blank in the form of a house.

We bend the paper on the left and right sides to the center line. Turn the workpiece over and do the same.

Expand these folds and tuck small triangles from the bottom center. Immediately bend them inward.

On the left side, bend the paper to the first vertical line.

Repeat this step one more time.

Do the same with the right side of the workpiece. Then we turn it over and repeat the same steps.

We bend the upper parts of the triangle a little. Please note that they must not be connected.

Take the top of the triangle and wrap it as in the photo.

We straighten it back and due to this we get two bends, which are marked by arrows.

Raise the triangle and clamp it with a paper clip. Slightly stretch this part.


Turn the workpiece over, bend the triangle down, and then up.


We straighten the paper in the middle. Origami cat torso is ready!

We proceed to the preparation of the second part of the box. To do this, take a small square, bend it diagonally. Then we connect the corners of the triangle with its vertex.


From below we bend a small triangle, and bend the upper corners down.

We bend part of the upper triangle, as shown in the photo.

Turn the workpiece over and bend the lower triangle two times.

The head for the box in the form of a cat is ready. We connect the parts with double-sided tape. If you wish, you can slightly decorate the figure with paints or tie a bow for decoration.

It remains only to fill the box with sweets.

Original gift box
An origami box is ideal for packing a small gift.

In the process we will need the following:
- colored paper;
- scissors;
- shiny ribbon;
- ruler;
- pencil.

We take a sheet of paper and cut out two squares of the same size for the future box.

One of them is folded diagonally and straightened, as shown in the photo.

We bend two corners of the workpiece to a central point.

We unfold the workpiece back. This is necessary in order to form parallel lines.

We bend the lower corner to the first horizontal line.

We bend a corner to the upper horizontal line.

At this stage, the first sheet should look that way.

We unfold the blank and repeat the same steps to get such creases as in the photo.

The sides are bent to the center point.

We bend them again, as shown in the photo. This is how the walls of the box are formed.

Fold the top so that the paper is folded inward.

In the same way, we fold the lower edge of the workpiece.

One piece of stylish gift box is ready.

We take the second sheet of paper and fold it in the same way as the first to the stage, which is in the photo.

In the upper and lower parts we make additional folds along the diagonal.

They will be needed in order to fold the top corner.

Repeat the same with the bottom corner. It is very important that they look as uniform as possible.

Carefully cut along the corners on each side.

We twist the tips with scissors.

We connect two blanks, inserting one into the other.

Tie a shiny ribbon around the edges for decor.

Boxes made using the origami technique always look especially cute and gentle. They are ideal for small presentations, bonbonnieres for weddings or children's theme parties. Therefore, we recommend that you try to make at least one option to understand the basics of this technique.
Watch the video: Easy DIY Origami Box. DIY Back to School Crafts (December 2024).

-
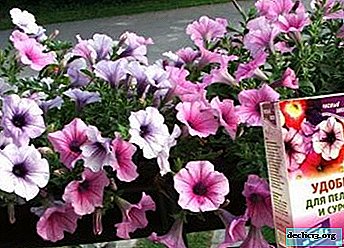
When and how to feed the petunia: choose the best fertilizer for the flower
Undoubtedly, petunia is one of the honorable representatives of flower beds, gardens and kitchen gardens! It is unique in its simplicity, and at the same time is fraught with some kind of mystery. Although it is considered quite unpretentious, but still requires some attention. In order to forge your views, you need proper care, one of the components of which is fertilizer. ... -
-
-